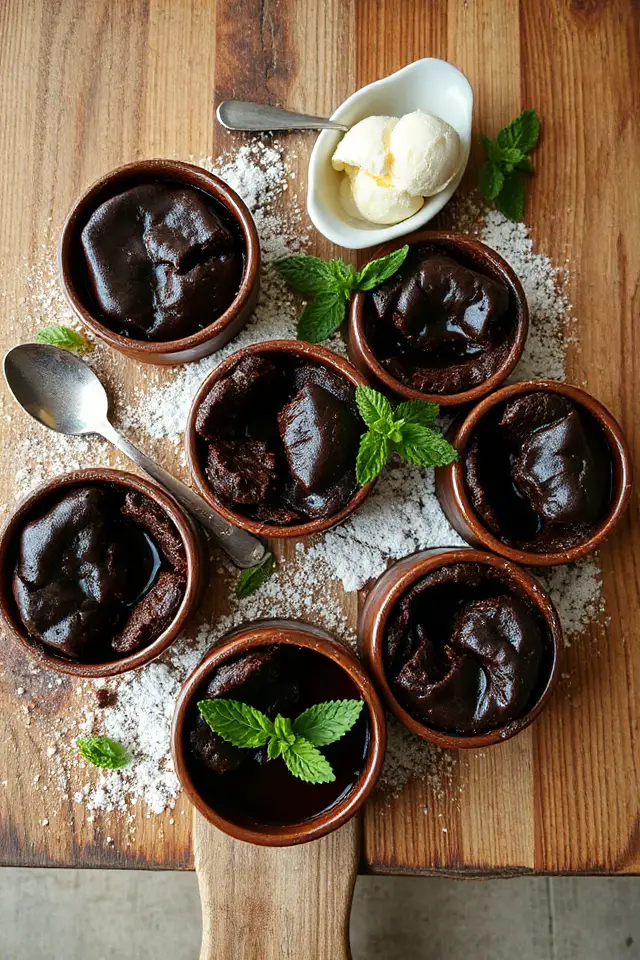
Why Molten Chocolate Cake Is a Must-make Recipe
If you’re looking for a dessert that never fails to impress, molten chocolate cake is a must-make.
There’s something magical about cutting into that warm, gooey center. It’s like a hug for your taste buds!
I love how it’s simple yet elegant, making it perfect for any occasion. The aroma of melting chocolate fills the kitchen, creating anticipation before the first bite.
Plus, you can easily customize it with your favorite ice cream or fruit.
Whether it’s a dinner party or a cozy night in, this dessert always brings smiles and satisfied sighs.
Trust me, it’s unforgettable!
Ingredients of Molten Chocolate Cake
When it comes to whipping up a delicious molten chocolate cake, the magic truly starts with the ingredients. You don’t need a ton of fancy stuff to create this delightful dessert. In fact, the simplicity of the ingredients is part of what makes it so appealing.
Just a handful of quality items can lead to a treat that feels luxurious. Imagine the rich chocolate melting in your mouth paired with a scoop of ice cream—heavenly, right? So let’s plunge in and see what you’ll need for this indulgent experience.
Ingredients:
- 2 teaspoons butter (for greasing the ramekins)
- 1 tablespoon sifted cocoa (for coating the ramekins)
- 2/3 cup butter (not margarine, for the cake)
- 5 ounces semi-sweet chocolate baking squares
- 2 large egg yolks
- 2 large eggs
- 1 1/2 cups icing sugar
- 1/2 cup all-purpose flour
- Black cherry ice cream or vanilla ice cream (for serving)
Now, a couple of things to reflect on when you’re gathering these ingredients. First off, don’t skimp on the chocolate. A good quality semi-sweet chocolate can make all the difference in flavor. You want that rich, deep chocolate taste to shine through.
And while I’ve suggested black cherry or vanilla ice cream, feel free to get creative. Maybe a scoop of salted caramel or even raspberry sorbet? Just think about what flavors make your heart sing.
And remember, the butter should be unsalted; it really helps the cake to rise beautifully without any salty distractions. So gather your goodies, and get ready to create something truly special.
How to Make Molten Chocolate Cake

Alright, let’s explore the magical world of molten chocolate cake. First things first, you’ll want to prep your ramekins. Take 2 teaspoons of butter and grease the insides of six 3/4 cup ramekins. This is vital, folks. You don’t want your precious cakes to stick and then create a sad, crumbly mess.
After that, grab 1 tablespoon of sifted cocoa and coat the bottom and sides of each ramekin, shaking out any excess cocoa like you’re dusting off a fancy outfit. This step not only adds flavor but also guarantees that your cakes release perfectly when it’s time to serve.
Now, let’s get to the chocolatey goodness. In a small heavy saucepan, combine 2/3 cup of butter (make sure it’s not margarine) and 5 ounces of semi-sweet chocolate baking squares. Set the heat to low and stir often until everything is almost melted. You don’t want to overheat this mixture; we’re going for smooth, not scorched chocolate.
Once it’s just about melted, take it off the heat and let it cool slightly while you work on the eggs. In a medium bowl, beat together 2 large egg yolks and 2 large eggs for about 2 minutes until they’re frothy—think of it as your morning workout for the eggs.
Now, slowly beat in 1 1/2 cups of icing sugar on low speed. This is where things start to get sweet. Add in that luscious chocolate mixture along with 1/2 cup of all-purpose flour, and mix it all up until it’s thick and glossy. You want to see that rich, chocolatey batter coming together like a beautiful team.
With the batter ready, it’s time to pour it into your prepared ramekins. Divide the batter evenly, and then place those little cups of chocolate heaven on a baking sheet.
Pop them in a preheated 450°F oven for about 12 minutes. You’re looking for them to rise and set around the edges while the center remains wobbly. It’s like they’re doing a little dance in the oven, and you want them to keep that rhythm.
Once that timer goes off, pull them out and let them stand for 3 to 5 minutes. This is the hardest part—waiting. After that, run a knife around the sides to loosen the cakes, cover each one with a plate, and invert to remove.
They can sit there, still lovely and warm, for up to 20 minutes. Serve them up with a scoop of your favorite ice cream, and you’re in for a treat that’s sure to impress. Just don’t forget to remind everyone that you totally made these little delights.
Molten Chocolate Cake Substitutions & Variations
While sticking to the classic molten chocolate cake recipe is a sure way to impress, exploring substitutions and variations can elevate your dessert game even further.
For a richer flavor, try using dark chocolate instead of semi-sweet. If you’re feeling adventurous, add a splash of espresso or a pinch of sea salt to enhance the chocolate.
Want to switch up the filling? Consider using caramel or raspberry puree for a fruity twist.
You can even experiment with different flours, like almond or coconut, for a gluten-free option.
These simple tweaks can make your molten cake uniquely yours!
What to Serve with Molten Chocolate Cake
To truly elevate your molten chocolate cake experience, consider pairing it with complementary flavors and textures.
I love serving it with a scoop of vanilla or black cherry ice cream, as the cold creaminess contrasts perfectly with the warm, gooey center. A sprinkle of sea salt enhances the chocolate’s richness, while fresh berries add a tart brightness.
Whipped cream is another favorite; its lightness balances the cake’s decadence. For a touch of elegance, drizzle some raspberry or caramel sauce around the plate.
Each of these additions creates a delightful harmony that takes your dessert to the next level!
Additional Tips & Notes
When preparing molten chocolate cake, I recommend ensuring all your ingredients are at room temperature, as this helps achieve a smoother batter and better overall texture.
Don’t skip the step of greasing the ramekins; it’s essential for easy removal. If you want to experiment, try adding a pinch of espresso powder to enhance the chocolate flavor.
Keep an eye on the baking time; every oven is different, and you want that gooey center.
Finally, serve the cakes immediately after inverting for the best experience—warm, melty chocolate paired with ice cream is simply divine!
Enjoy your baking adventure!
