

Why Banana Chocolate Bread Is a Must-make Recipe
When you’re looking for a delicious and comforting treat, banana chocolate bread is an absolute must-make. It’s the perfect blend of sweet and rich flavors that never fails to satisfy.
I love how the bananas add moisture while the chocolate chips create delightful bursts of sweetness. This recipe is simple enough for a beginner yet impressive enough to wow guests.
The aroma wafting through my kitchen as it bakes is irresistible. Plus, it’s a great way to use up overripe bananas!
Trust me, once you try this, you’ll find yourself making it again and again.
Ingredients of Banana Chocolate Bread
When it comes to baking banana chocolate bread, the ingredients play a vital role in creating that scrumptious blend of flavors and textures we all crave. This recipe isn’t only easy to whip up, but it also lets you use those ripe bananas sitting on your counter, begging to be transformed into something delicious.
Seriously, there’s nothing quite like the combination of sweet bananas and rich chocolate to lift your spirits, right? So, let’s gather our ingredients and get ready to bake something that’ll make your kitchen smell heavenly.
Here’s what you’ll need to make this delightful treat:
- 1/2 cup butter, softened
- 1 cup sugar
- 2 large eggs
- 1 1/2 cups all-purpose flour
- 2 tablespoons cocoa powder
- 1 teaspoon baking soda
- 1 teaspoon salt
- 1/2 teaspoon ground cinnamon
- 1/2 cup sour cream
- 1 teaspoon vanilla extract
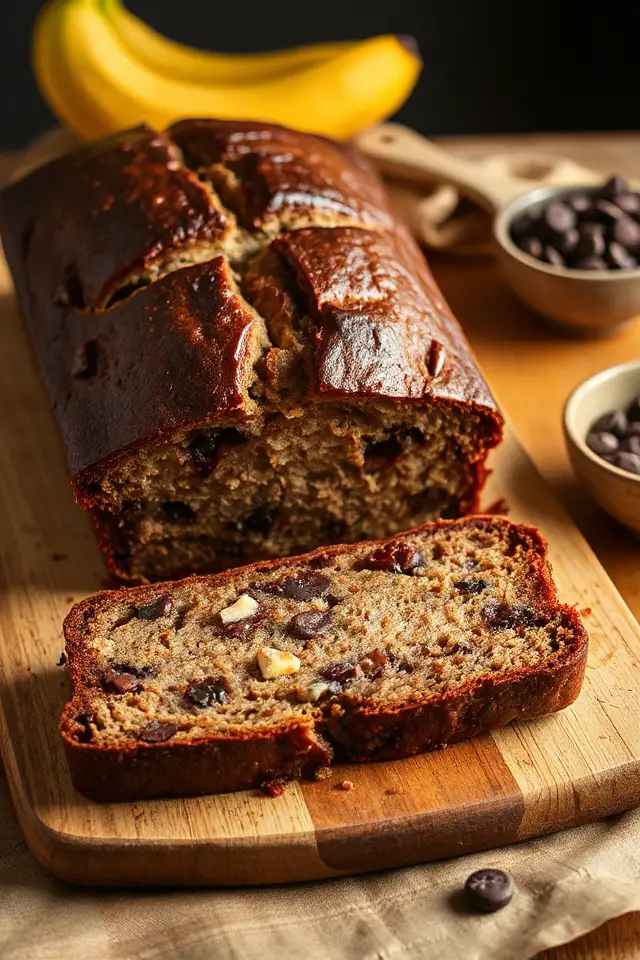
- 1 cup ripe bananas, mashed (about 2-3 bananas, depending on their size)
- 1/2 cup pecans, chopped (optional, but recommended)
- 1/3 cup miniature semisweet chocolate chips
Now, a little note about the ingredients. Using ripe bananas is key—they should be speckled with brown spots and soft to the touch. These bananas add natural sweetness and moisture to your bread, making it tender and flavorful.
And if you’re not a fan of nuts, feel free to skip the pecans; it’s all about what you enjoy. Oh, and those chocolate chips? They’re practically the cherry on top, offering delightful pockets of gooey chocolate goodness throughout the bread.
Trust me, it’s hard to go wrong with this combination. Let’s get ready to bake!
How to Make Banana Chocolate Bread
Making Banana Chocolate Bread is like taking a cozy hug and turning it into a delicious loaf. Ready to plunge into the baking adventure? Let’s get started.
First, you’ll want to grab your mixing bowl and your trusty electric mixer. Beat 1/2 cup of softened butter at medium speed until it’s nice and creamy. Then, gradually add in 1 cup of sugar, mixing well until everything is combined and fluffy. It’s like creating a little cloud of sweetness.
Now, crack in 2 large eggs, one at a time, making sure to beat well after each addition. Trust me; it makes a difference in the texture.
Now, let’s shift gears and mix the dry ingredients. In a separate bowl, combine 1 1/2 cups of all-purpose flour, 2 tablespoons of cocoa powder, 1 teaspoon of baking soda, 1 teaspoon of salt, and 1/2 teaspoon of ground cinnamon. It’s a bit of a dry party, but it’s all good.
Next, you’ll alternate adding this dry mix with 1/2 cup of sour cream to the butter mixture, starting and finishing with the sour cream. Just think of it as giving your bread a nice, creamy twist.
Once that’s all mixed in, stir in 1 teaspoon of vanilla extract, along with your 1 cup of mashed ripe bananas (which is about 2 to 3 bananas, depending on their size), 1/2 cup of chopped pecans, and 1/3 cup of miniature semisweet chocolate chips. The smell is already heavenly, isn’t it?
Now, the fun part—pouring the batter into two greased and floured 7 1/2 x 3 x 2 inch loaf pans. Make sure to spread it evenly, because nobody likes a lopsided loaf (unless you’re going for that rustic look).
Bake your banana chocolate bread in a preheated oven at 350 degrees for 50 to 55 minutes. The key is to keep an eye on it; when a wooden pick inserted into the center comes out clean, it’s ready to shine.
Once it’s out, let it cool in the pans for about 10 minutes before transferring it to wire racks. Your kitchen will smell amazing, and I guarantee you’ll be tempted to plunge right in before it cools completely. But try to resist; it’s worth the wait. Happy baking!
Banana Chocolate Bread Substitutions & Variations
If you’re looking to mix things up with your Banana Chocolate Bread, there are plenty of substitutions and variations to contemplate.
You can swap out the butter for coconut oil for a dairy-free option or use Greek yogurt instead of sour cream for added protein.
Want a nut-free version? Just omit the pecans or replace them with sunflower seeds.
For a richer flavor, try dark chocolate chips or white chocolate instead.
You can even add spices like nutmeg or cardamom for an extra kick.
Let your creativity shine and tailor the recipe to suit your taste preferences!
What to Serve with Banana Chocolate Bread
Serving Banana Chocolate Bread can elevate your breakfast or snack time experience.
I love pairing it with a dollop of cream cheese or a smear of almond butter for a delightful twist. Fresh fruit, like strawberries or blueberries, adds a rejuvenating contrast that balances the sweetness.
For a cozy touch, I often serve it with a steaming cup of coffee or a rich hot chocolate. If I’m feeling indulgent, a scoop of vanilla ice cream on the side creates a decadent dessert.
These combinations enhance the flavors of the bread, making every bite even more enjoyable. Enjoy experimenting!
Additional Tips & Notes
Pairing Banana Chocolate Bread with your favorite spreads and beverages can enhance the overall experience, but there are a few additional tips that can elevate your baking game.
First, make sure your bananas are very ripe for maximum sweetness. If you like a richer flavor, try adding a splash of espresso or coffee to the batter.
For a twist, you can substitute walnuts for pecans or use dark chocolate chips instead.
Don’t forget to check your bread for doneness a few minutes early; every oven is different.
Finally, wrap leftovers tightly to keep them moist and delicious!