
Why Chocolate Chip Pumpkin Bread Is a Must-make Recipe
When the leaves start to change and the air turns crisp, I can’t help but crave the comforting flavors of fall, and Chocolate Chip Pumpkin Bread is at the top of my list.
This delightful treat combines the warm, spicy notes of pumpkin with the sweetness of chocolate, creating a perfect balance that feels like a warm hug.
It’s not just about the taste; it fills my kitchen with an irresistible aroma that draws everyone in. Plus, it’s incredibly versatile—great for breakfast, dessert, or even as a thoughtful gift.
Trust me, once you try it, you’ll understand why it’s a must-make!
Ingredients of Chocolate Chip Pumpkin Bread
When it comes to baking, the right ingredients make all the difference, especially with something as cozy and delightful as Chocolate Chip Pumpkin Bread. This recipe is like autumn in a loaf, and the ingredients are key to getting that perfect blend of flavors.
Let’s dive right into what you need to whip up this delicious treat that will have everyone asking for seconds.
Ingredients:
- 3 cups white sugar
- 1 (14 ounce) can pumpkin
- 1 cup vegetable oil
- 2/3 cup water
- 4 eggs
- 3 1/2 cups all-purpose flour
- 1 tablespoon cinnamon
- 1 tablespoon ground nutmeg
- 2 tablespoons baking soda
- 1 1/2 teaspoons salt
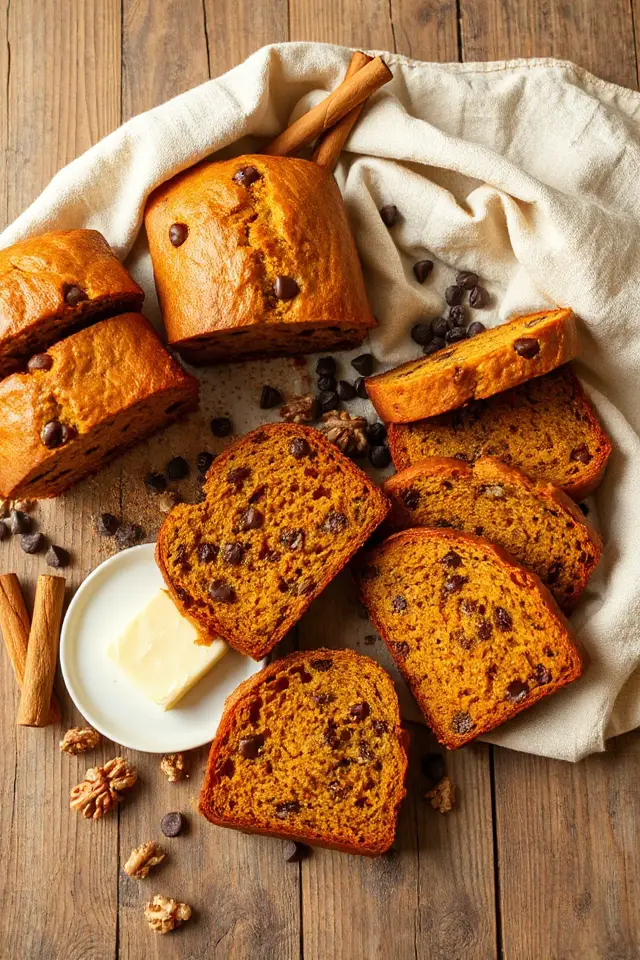
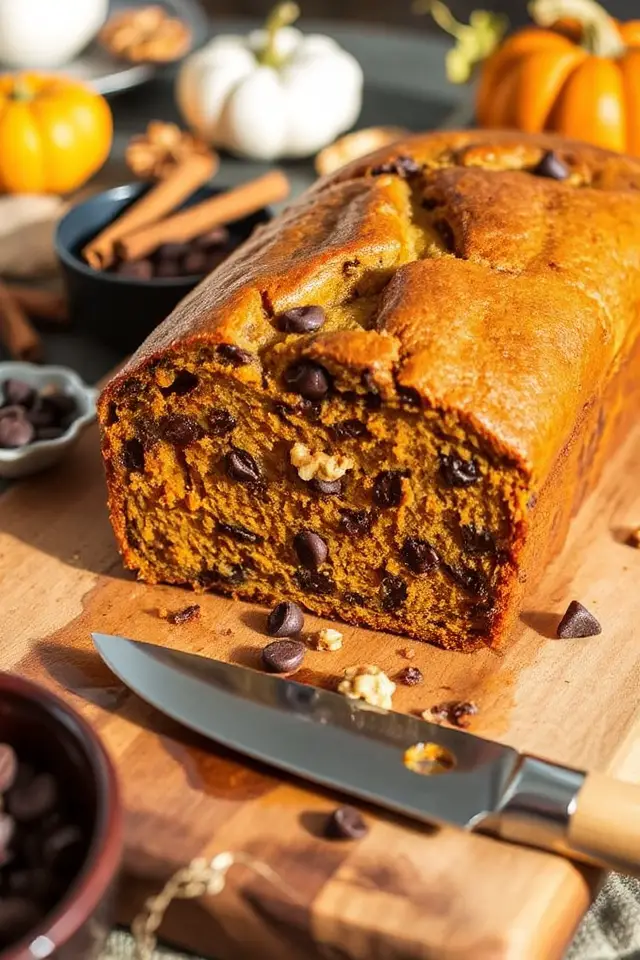
- 1 (6 ounce) package miniature semisweet chocolate chips
- 1/2 cup walnuts, chopped (optional)
Now, let’s chat about these ingredients. First off, the pumpkin is the star of the show, adding moisture and that lovely fall flavor. You can use canned pumpkin for convenience, but if you’re feeling adventurous, roasting your own pumpkin can elevate the dish.
Just be warned: it’s a labor of love, and your kitchen might end up looking like a pumpkin patch exploded. As for the chocolate chips, I recommend going for the miniature ones; they blend in beautifully and give you those little bursts of chocolatey goodness without overwhelming the bread.
And if you’re a walnut lover, toss those in. If not, no worries. It’s your bread, after all.
And remember, the beauty of baking is making it your own, so feel free to experiment a little. After all, who knows? You might just create a new family favorite.
How to Make Chocolate Chip Pumpkin Bread
Alright, let’s roll up our sleeves and plunge into the wonderfully cozy world of baking Chocolate Chip Pumpkin Bread. First things first, grab a large mixing bowl, because we’re going to start by combining 3 cups of white sugar, 1 (14 ounce) can of pumpkin, 1 cup of vegetable oil, 2/3 cup of water, and 4 eggs.
Now, this might sound like a lot of sugar, but trust me, it’s what gives this bread that delicious sweetness that makes you want to keep coming back for more. Using an electric mixer, beat everything together until it’s smooth and silky—imagine a pumpkin-spiced cloud. If you’re feeling a bit rebellious and decide to use fresh pumpkin, just know it’ll require some extra elbow grease, but the flavor will be worth it.
Once your pumpkin mixture is nice and smooth, it’s time to fold in the dry ingredients. So, grab 3 1/2 cups of all-purpose flour, 1 tablespoon of cinnamon, 1 tablespoon of ground nutmeg, 2 tablespoons of baking soda, and 1 1/2 teaspoons of salt.
Gently stir these into your wet mixture. You don’t want to overmix; just blend until everything is combined, and that lovely aroma of spices fills your kitchen. Now, let’s add in those little pockets of joy—1 (6 ounce) package of miniature semisweet chocolate chips and 1/2 cup of chopped walnuts. Fold them in carefully, like you’re cradling a tiny pumpkin-spiced baby.
Now, here comes the fun part. Grease and flour 3 (1 lb.) coffee cans or loaf pans. I mean, who doesn’t want to bake in coffee cans? Just make sure they’re clean and dry before you fill them 1/2 to 3/4 full.
Pop those bad boys into a preheated oven at 350 degrees Fahrenheit and let them bake for about 1 hour. The smell will be intoxicating, and you might find yourself doing a little happy dance in the kitchen. To check if they’re done, insert a knife into the center; if it comes out clean, you’re golden.
Once baked, let them cool on wire racks before removing them from the cans or pans. If you’re not devouring them immediately, wrap them in cellophane, and if you’re feeling ambitious, wrap them again in foil and toss them into a ZipLoc freezer bag for a later treat.
There you go, you’ve just made Chocolate Chip Pumpkin Bread that could very well be the highlight of your baking repertoire!
Chocolate Chip Pumpkin Bread Substitutions & Variations
If you’re looking to mix things up with your Chocolate Chip Pumpkin Bread, there are plenty of tasty substitutions and variations to contemplate.
You can swap out half the sugar for brown sugar for a deeper flavor, or use applesauce instead of oil for a healthier twist.
Try adding dried cranberries or raisins for extra texture, or replace walnuts with pecans or almonds.
If you’re feeling adventurous, a teaspoon of vanilla extract or a pinch of ginger can elevate the taste.
You can even experiment with different types of chocolate chips, like dark or white chocolate, for a unique touch!
What to Serve with Chocolate Chip Pumpkin Bread
After experimenting with different substitutions and variations in your Chocolate Chip Pumpkin Bread, you might be wondering what to pair it with for the perfect serving experience.
I love serving it warm with a dollop of cream cheese frosting or a spread of butter for that extra richness. A cup of hot coffee or spiced chai complements the flavors beautifully.
For a cozy brunch, consider pairing it with yogurt and fresh fruit, adding an invigorating contrast. If you’re feeling indulgent, a scoop of vanilla ice cream on the side makes for a delightful treat.
Enjoy your delicious creation!
Additional Tips & Notes
While baking Chocolate Chip Pumpkin Bread can be a delightful experience, a few additional tips can enhance your results.
First, make sure your ingredients are at room temperature for a smoother batter. If you prefer a stronger pumpkin flavor, try adding a bit more pumpkin puree or spices.
I also recommend toasting the walnuts lightly before mixing them in; it really brings out their flavor.
Finally, keep an eye on the baking time—ovens vary, so check for doneness a few minutes early.
Once cooled, wrap your bread tightly to retain moisture and enjoy it for days!