
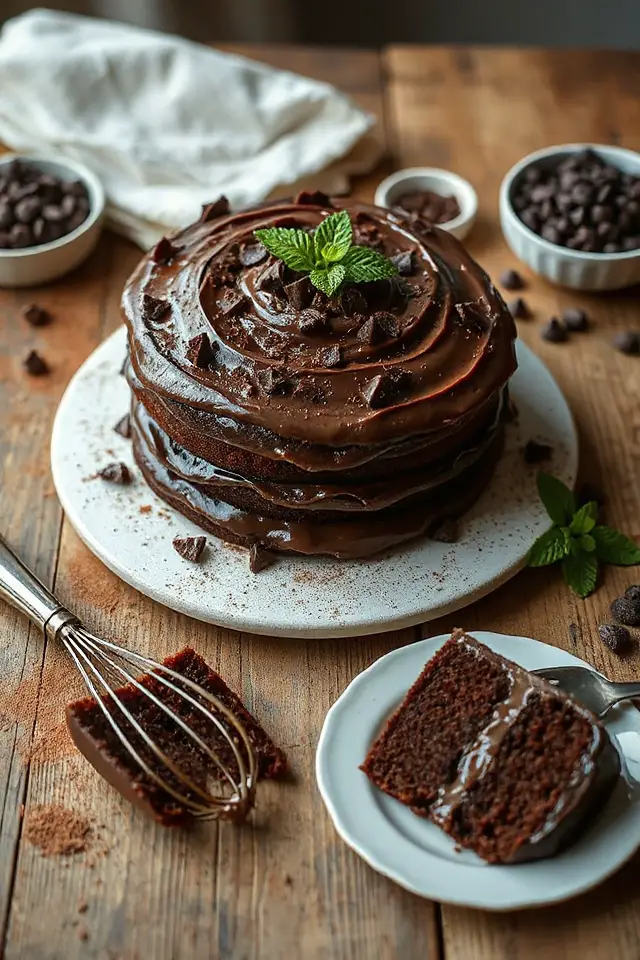
Why Chocolate Fudge Cake Is a Must-make Recipe
When it comes to indulgent desserts, I can’t help but think that chocolate fudge cake stands out as a must-make recipe.
There’s something magical about the rich, velvety texture that just melts in your mouth. I love how it combines deep chocolate flavor with a moist crumb, making every bite a little piece of heaven.
Plus, it’s versatile—you can serve it as a fancy dessert or enjoy a slice with your morning coffee. Friends and family always rave about it, and there’s nothing quite like the joy of sharing a homemade treat.
Trust me, you’ll want to make this cake again and again!
Ingredients of Chocolate Fudge Cake
When you’re ready to whip up a delightful Chocolate Fudge Cake, having the right ingredients on hand makes all the difference. Picture yourself in your cozy kitchen, the aroma of melting chocolate wafting through the air as you gather everything you need. It’s like a warm hug, isn’t it?
This cake isn’t just about satisfying your sweet tooth; it’s about creating memories, whether it’s a birthday celebration or just a Tuesday that needs a sprinkle of joy. So, let’s dive right into what you’ll need to get started on this velvety masterpiece.
Ingredients:
- 1/2 cup butter, softened
- 1 (16 ounce) package brown sugar
- 3 eggs
- 3 ounces unsweetened chocolate squares, melted and cooled
- 2 1/4 cups sifted cake flour
- 2 teaspoons baking soda
- 1/2 teaspoon salt
- 1 (8 ounce) carton sour cream
- 1 cup hot water
- 1 1/2 teaspoons vanilla
Now, let’s chat about these ingredients a bit. First off, don’t skimp on the chocolate—using unsweetened chocolate squares gives the cake that rich flavor we all crave.
And if you’re feeling adventurous, you could experiment with different types of sugars or even throw in some chocolate chips for extra gooeyness. Just imagine biting into a slice and discovering those melty surprises. Yum.
And while we’re on the topic of butter, make sure it’s softened to room temperature. Trust me, it makes beating it with the sugar so much easier. You want that nice creamy texture, not a lumpy batter that looks like it’s had a rough day.
How to Make Chocolate Fudge Cake
So, you’ve gathered your ingredients, and now it’s time to plunge into the delightful process of making your very own Chocolate Fudge Cake. This is where the magic happens, and trust me, it’s easier than you might think.
First, grab that 1/2 cup of softened butter and toss it into your mixing bowl. Now, don’t just toss it in; we want to cream it together with 1 (16 ounce) package of brown sugar. Put some muscle into it and beat them together until it’s nice and fluffy. Think of it as giving your butter a little spa treatment.
Once they’re all cozy together, add in 3 eggs, one at a time. Make sure to beat well after each addition—this is where the cake starts to get some structure.
Next up, let’s bring in the star of the show: 3 ounces of melted and cooled unsweetened chocolate. Gently fold it into the mix until everything is combined.
Now, in a separate bowl, you’ll want to combine 2 1/4 cups of sifted cake flour, 2 teaspoons of baking soda, and 1/2 teaspoon of salt. Gradually add this dry mixture to your creamed butter and sugar, alternating it with 1 (8 ounce) carton of sour cream. This back-and-forth action keeps your batter nice and smooth, and it’s kind of like a dance—one step forward, one step back.
Once you’ve got that all mixed in, pour in 1 cup of hot water and 1 1/2 teaspoons of vanilla. Stir it all together until it’s well combined.
Now, here comes the fun part—pouring the batter into your greased and floured 9-inch cake pans. You should have enough for three pans, so don’t be shy; get every last drop in there.
Bake these beauties at 350 degrees for about 25 minutes, or until a toothpick comes out clean. While they’re baking, resist the urge to peek too often; we don’t want to let the heat out.
When the cakes are done, let them cool in the pans for about 10 minutes. Then, gently turn them out onto wire racks to cool completely.
At this point, the aroma filling your kitchen will be absolutely divine. Just imagine the looks on everyone’s faces when they see this rich, chocolatey masterpiece. You might even feel like a baking superstar. And honestly, who doesn’t love a little homemade cake magic?
Chocolate Fudge Cake Substitutions & Variations
While I love the classic Chocolate Fudge Cake recipe, there’s always room to get creative with substitutions and variations.
For a richer flavor, I sometimes swap in dark chocolate for the unsweetened chocolate. If I’m out of sour cream, Greek yogurt works just as well. You can also use coconut oil instead of butter for a dairy-free option.
Want a hint of coffee? Just add a tablespoon of instant coffee to the hot water. For a fun twist, try adding chopped nuts or a swirl of peanut butter in the batter.
The possibilities are endless, so have fun experimenting!
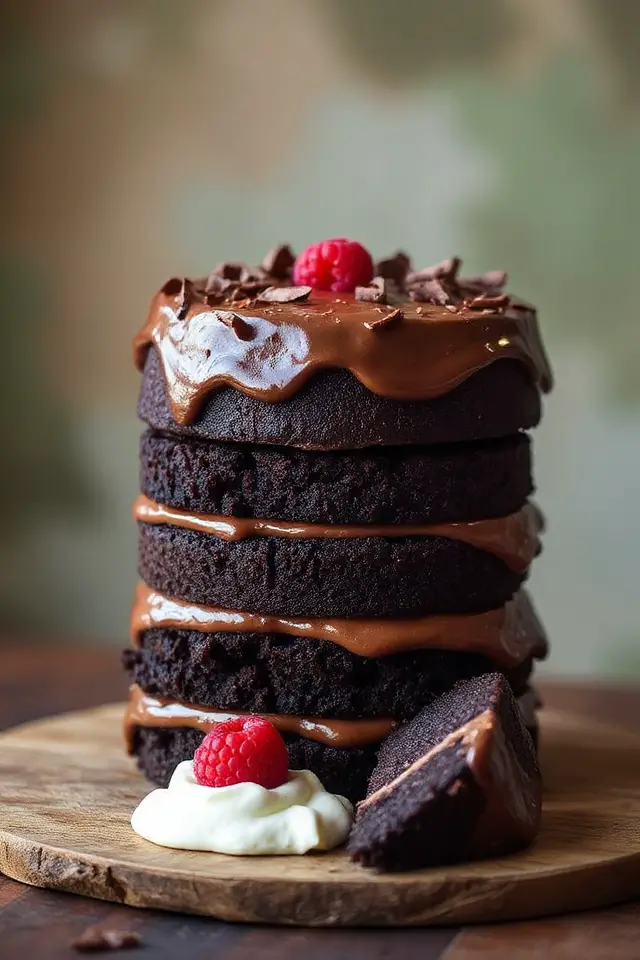
What to Serve with Chocolate Fudge Cake
After whipping up a delicious Chocolate Fudge Cake, you might wonder what to pair it with to enhance your dessert experience.
I love serving it with a scoop of vanilla ice cream; the creaminess perfectly balances the rich chocolate. A dollop of whipped cream adds a light touch, too.
Fresh berries, like raspberries or strawberries, bring a tart contrast that brightens each bite. For a decadent twist, drizzle chocolate or caramel sauce over the slice.
If you’re feeling adventurous, a sprinkle of sea salt can elevate the flavors beautifully. Trust me, these pairings will take your cake to the next level!
Additional Tips & Notes
To guarantee your Chocolate Fudge Cake turns out perfectly every time, I recommend a few essential tips.
First, make sure your butter is softened, as it helps create a smooth batter. When melting the chocolate, don’t overheat it – I usually do this in short bursts in the microwave.
Also, sift your cake flour to avoid lumps and assure a light texture. Always let the cakes cool completely before frosting; this prevents the icing from melting.
Finally, feel free to add your favorite nuts or chocolate chips for an extra touch. Enjoy the process, and happy baking!