
Why No Bake Chocolate Cheesecake Is a Must-make Recipe
Whenever I crave something sweet and indulgent, the No Bake Chocolate Cheesecake always comes to mind. It’s the ultimate dessert for anyone who loves chocolate.
I adore how easy it’s to whip together without turning on the oven, which is a huge plus during hot days. The creamy texture combined with that rich chocolate flavor is simply irresistible.
Plus, it’s versatile enough for any occasion, whether it’s a birthday party or a casual family dinner. Every bite is a delightful experience, and I can’t help but share it with friends.
Trust me, you’ll want this recipe in your collection!
Ingredients of No Bake Chocolate Cheesecake
When it comes to whipping up something sweet and delicious without breaking a sweat, the No Bake Chocolate Cheesecake is an absolute champion. You don’t even need to turn on the oven, which is a blessing, especially when the heat is on outside or you’re just too cozy on the couch to deal with any baking drama.
The combination of cream cheese, chocolate pudding, and Cool Whip creates a dreamy texture that feels like a little slice of heaven. So, let’s gather our ingredients and get ready to create this easy yet decadent dessert that will have everyone begging for seconds.
Here’s what you’ll need to make this delightful No Bake Chocolate Cheesecake:
- 16 ounces graham cracker crumbs
- 1/2 cup butter, melted
- 8 ounces cream cheese, softened
- 1 cup powdered sugar
- 16 ounces Cool Whip, thawed
- 2 – 4 ounces instant chocolate pudding mix
- 3 cups milk
- 1 1/2 cups chocolate-covered English toffee bars, crushed
Now, before you plunge into mixing those ingredients, let’s chat about a couple of things. First off, make sure your cream cheese is really softened—like, room temperature soft. If it’s too cold, you’ll end up with a lumpy cheesecake, and no one wants that.
Also, when choosing your chocolate pudding mix, you can go a little wild here; if you want it extra chocolatey, toss in that extra 4 ounces. And about those toffee bars, they add a nice crunch, but if you’re not a fan, feel free to swap them out for something else, like crushed Oreos or even nuts.
Just remember, it’s your cheesecake, so make it yours.
How to Make No Bake Chocolate Cheesecake
Now that you’ve gathered your ingredients, let’s plunge into the fun part: making your No Bake Chocolate Cheesecake. Start with the base, which is super simple. Grab 16 ounces of graham cracker crumbs and mix them with 1/2 cup of melted butter in a bowl. You want to make sure that every crumb is coated in that buttery goodness—it’s what makes the crust so delicious.
Once you’ve got that mixture, press it firmly into the bottom of a 13×9 dish. It’s like giving your cheesecake a cozy bed to lay on, so don’t be shy; use your hands or a spatula to spread it out evenly. Set that aside for now; it’s going to be the foundation of your dessert.
Now, let’s move on to the creamy filling. In a large mixing bowl, combine 8 ounces of softened cream cheese and 1 cup of powdered sugar. Whip it together until it’s nice and smooth. Trust me, there’s nothing worse than biting into a lumpy cheesecake.
After that, fold in 2 cups of thawed Cool Whip gently—yes, we want that airy texture to stay fluffy. This mix is going to be heavenly, so you might be tempted to sneak a spoonful. I won’t tell if you don’t.
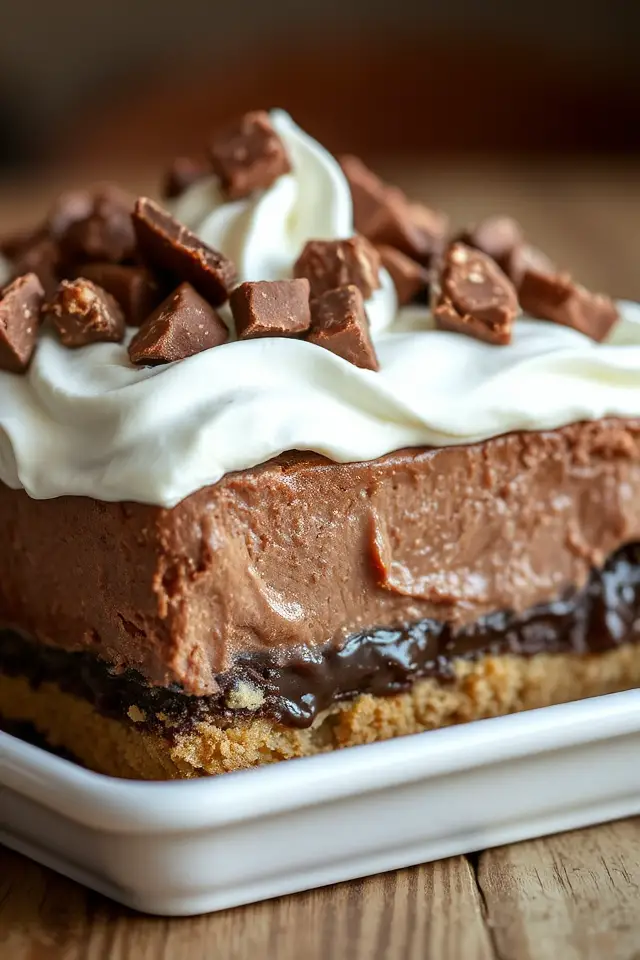
Spread this luscious cream cheese mixture over your graham cracker crust, just like frosting a cake. Next up, grab your instant chocolate pudding mix. In another bowl, whisk together 2 to 4 ounces of that pudding mix with 3 cups of milk. The extra pudding will give it a richer chocolate flavor, so go big if you’re feeling adventurous.
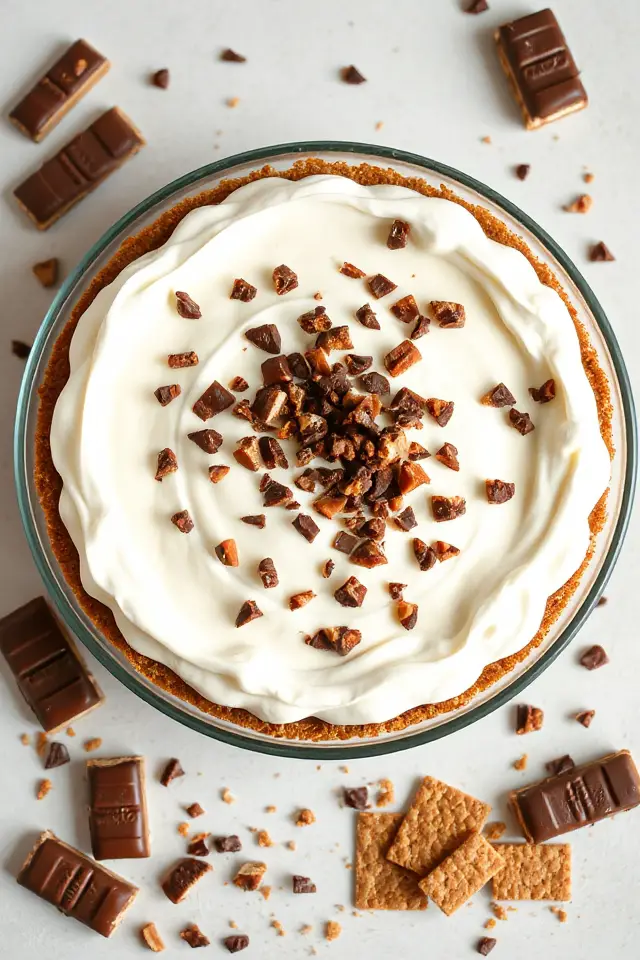
Whisk it for about 2 minutes until it thickens, then pour it over the cream cheese layer. Finally, spread the remaining 16 ounces of Cool Whip on top like a fluffy cloud, and don’t forget to sprinkle 1 1/2 cups of crushed chocolate-covered English toffee bars on top for that delightful crunch.
Once you’ve built this masterpiece, it’s time for the hardest part: waiting. Pop the cheesecake in the fridge and let it chill until it’s set. This usually takes a few hours, but if you can resist stealing a slice (or two) before then, you’ll be rewarded with a slice of pure bliss.
No Bake Chocolate Cheesecake Substitutions & Variations
After creating that delicious base and creamy filling for your No Bake Chocolate Cheesecake, you might want to get a little creative with substitutions and variations.
For a gluten-free option, swap graham crackers with almond flour or gluten-free cookies. Cream cheese can be replaced with mascarpone for a richer taste. If you prefer a lighter dessert, use Greek yogurt instead of cream cheese.
You can also mix in some peanut butter for a nutty twist or add espresso powder for a mocha flavor. Don’t hesitate to experiment with different toppings like fresh berries or caramel sauce to elevate your cheesecake!
What to Serve with No Bake Chocolate Cheesecake
What pairs well with a rich No Bake Chocolate Cheesecake? I love serving it with a scoop of vanilla ice cream; the creamy texture complements the cheesecake perfectly.
Fresh berries, like raspberries or strawberries, add a tart contrast that brightens each bite. If you’re feeling adventurous, a drizzle of caramel or chocolate sauce elevates the dessert even more. A dollop of whipped cream on top brings extra lightness, too.
For drinks, a rich coffee or a glass of dessert wine pairs beautifully, enhancing the chocolate flavor. Each addition makes this cheesecake experience even more delightful!
Additional Tips & Notes
When you’re ready to make your No Bake Chocolate Cheesecake even more delightful, consider a few helpful tips.
First, let your cream cheese soften completely for a smoother texture. If you like a richer chocolate flavor, add an extra ounce or two of pudding mix.
Don’t rush the chilling process; letting it set overnight really enhances the flavors. For an elegant touch, drizzle melted chocolate over the top before serving.
And if you want to switch things up, try adding crushed nuts or different toppings. Enjoy experimenting, and don’t forget to savor every delicious bite!