

Why Chocolate Peanut Butter Pie Is a Must-make Recipe
Why should you consider making a Chocolate Peanut Butter Pie? Well, let me tell you, it’s a dessert that combines two beloved flavors into one decadent treat.
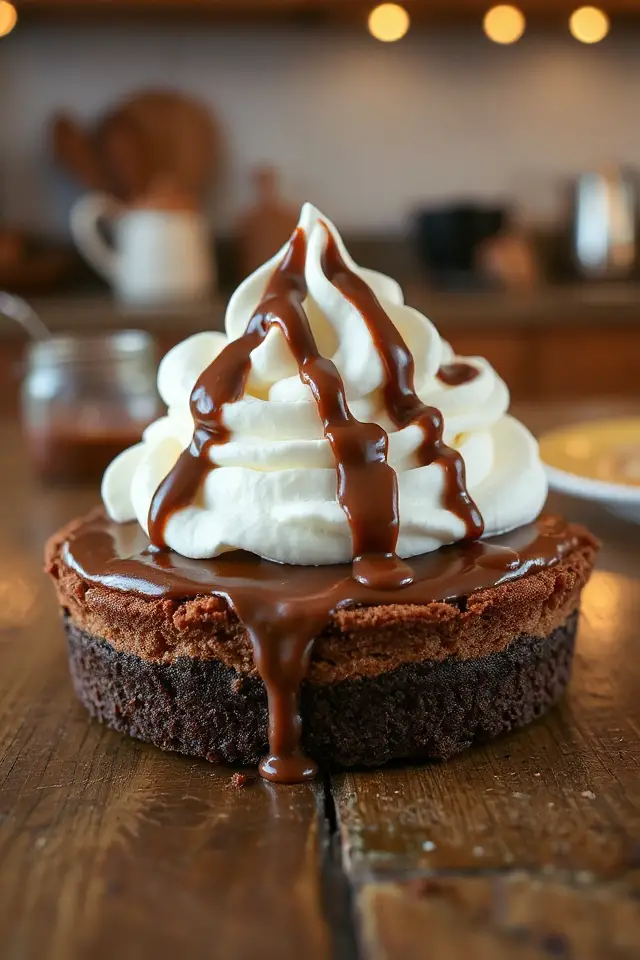
The rich, creamy filling is so satisfying, and it’s surprisingly easy to whip up. Whether you’re hosting a gathering or just craving something sweet, this pie impresses everyone.
The contrast of chocolate and peanut butter creates a delightful taste sensation that’s hard to resist. Plus, it’s a no-bake recipe, making it perfect for warm days when you don’t want to heat the kitchen.
Trust me; this pie will become a staple in your dessert repertoire!
Ingredients of Chocolate Peanut Butter Pie
When it comes to dessert, few things can match the delightful combination of chocolate and peanut butter. If you’re ready to whip up something truly indulgent, then a Chocolate Peanut Butter Pie is just what you need. This pie isn’t just about the flavor; it’s rich, creamy, and oh-so-satisfying.
Plus, you don’t even have to bake it, which means less time in the kitchen and more time enjoying your creation. So, let’s explore the ingredients you’ll need to make this luscious dessert.
Here’s what you’ll need:
- 1 chocolate cookie pie crust (store-bought or homemade)
- 1 cup creamy peanut butter
- 1 (8-ounce) package cream cheese (softened)
- 1/2 cup sugar
- 1 (12-ounce) container whipped topping
- 1 (11 3/4-ounce) container hot fudge
- 2 tablespoons hot fudge (for drizzling)
- 2 tablespoons creamy peanut butter (for drizzling)
- 2 small Ziploc bags (for drizzling)
Now, let’s talk about the ingredients a bit more, shall we? First off, using a chocolate cookie crust really sets the stage for that rich chocolate flavor—think of it as the delicious foundation of your pie.
And while creamy peanut butter is a must, you could go for crunchy if you want a little texture. Just imagine those bites of peanut crunch mingling with the smoothness of the cream cheese and whipped topping; it’s heavenly.
Don’t skimp on the hot fudge either; it’s the cherry on top, quite literally, since it adds a glossy finish and an extra layer of chocolate goodness.
How to Make Chocolate Peanut Butter Pie
Now that we’ve gathered all our ingredients for the Chocolate Peanut Butter Pie, let’s jump into the fun part—making it! First things first, take that 1 cup of creamy peanut butter and toss it in a mixing bowl. You’ll also want to add in the softened 8-ounce package of cream cheese and 1/2 cup of sugar.
Now, grab your electric mixer and beat these ingredients together until they’re smooth and creamy. Picture yourself on a mini baking show—this is where you can really show off those mixing skills! It should come together nicely, and if it doesn’t, well, that’s just your cue to keep mixing.
Once you’ve achieved that perfect peanut butter mixture, it’s time to fold in 3 cups of whipped topping. Yes, you read that right—fold, don’t stir. It’s all about keeping that light and fluffy texture. So, gently combine them until you can’t see any more white streaks.
Now, this creamy goodness is ready to be smoothed into your pie crust. Whether you opted for a store-bought chocolate cookie crust or bravely ventured into the homemade territory, pour that luscious mixture right in, spreading it evenly.
Next up, let’s get saucy—literally. Grab your 11 3/4-ounce container of hot fudge and pour a generous layer over the top of your pie filling. Don’t skimp here; this is the chocolatey crown your pie deserves.
Now, cover the pie and pop it in the refrigerator. Let it chill for at least a couple of hours, but if you can resist the temptation, overnight is even better.
When you’re ready to serve, bring it out and spread the remaining whipped topping over the hot fudge layer, creating a beautiful, fluffy mountain.
For the finishing touch, take your two small Ziploc bags, fill one with 2 tablespoons of hot fudge and the other with 2 tablespoons of creamy peanut butter. Knead them gently until they’re soft.
Then, cut a tiny corner off each bag and drizzle away! You’ll create swoops and swirls that make your pie look like a dessert masterpiece. Just remember, it doesn’t have to be perfect; it just has to be delicious.
Chocolate Peanut Butter Pie Substitutions & Variations
While I love the classic Chocolate Peanut Butter Pie, there are plenty of ways to mix things up if you’re feeling adventurous.
For a gluten-free option, try using almond flour for the crust or a pre-made gluten-free crust. You can swap out creamy peanut butter for crunchy for added texture.
If you’re a chocolate lover, use dark chocolate fudge instead of regular. You might even experiment with different toppings, like crushed cookies or drizzled caramel.
For a lighter version, consider using Greek yogurt in place of cream cheese. The possibilities are endless, so let your creativity run wild!
What to Serve with Chocolate Peanut Butter Pie
After exploring some fun substitutions and variations for Chocolate Peanut Butter Pie, you might be wondering what to serve alongside this decadent dessert.
I love pairing it with a tall glass of cold milk or a hot cup of coffee to balance the richness. Fresh berries, like raspberries or strawberries, add a nice tart contrast that complements the sweetness perfectly.
For a bit of crunch, consider some chopped nuts or a sprinkle of sea salt on top. If you’re feeling adventurous, a scoop of vanilla ice cream takes indulgence to the next level.
Trust me, you won’t regret it!
Additional Tips & Notes
To guarantee your Chocolate Peanut Butter Pie turns out perfectly every time, I recommend paying attention to a few key details.
First, make sure your cream cheese is softened; it blends better with the peanut butter.
For the crust, a store-bought chocolate cookie crust saves time, but homemade adds a personal touch.
Don’t rush the refrigeration process; letting it chill for at least four hours guarantees the flavors meld beautifully.
When drizzling the fudge and peanut butter, kneading them in the bags makes it easier to control the flow.
Finally, serve chilled for the best texture and flavor experience! Enjoy your creation!