
Why Chocolate Peppermint Cookies Is a Must-make Recipe
If you haven’t tried making Chocolate Peppermint Cookies yet, you’re really missing out on a delightful holiday treat.
These cookies combine rich chocolate with a revitalizing burst of peppermint, creating a flavor explosion that’s perfect for the season.
I love how they bring back nostalgic memories of winter festivities and warm gatherings. The moment I bite into one, I’m transported to cozy evenings by the fire.
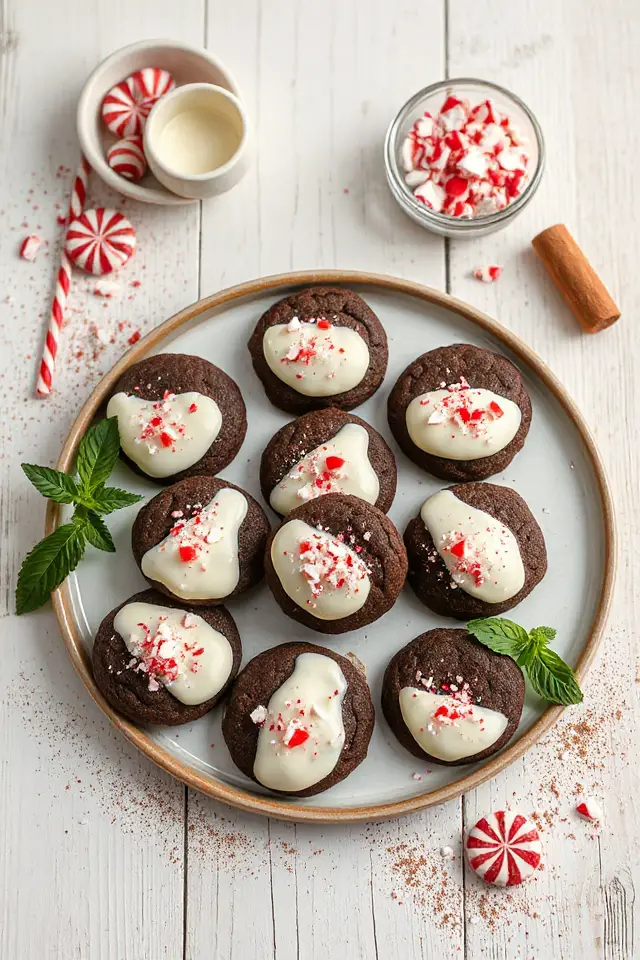
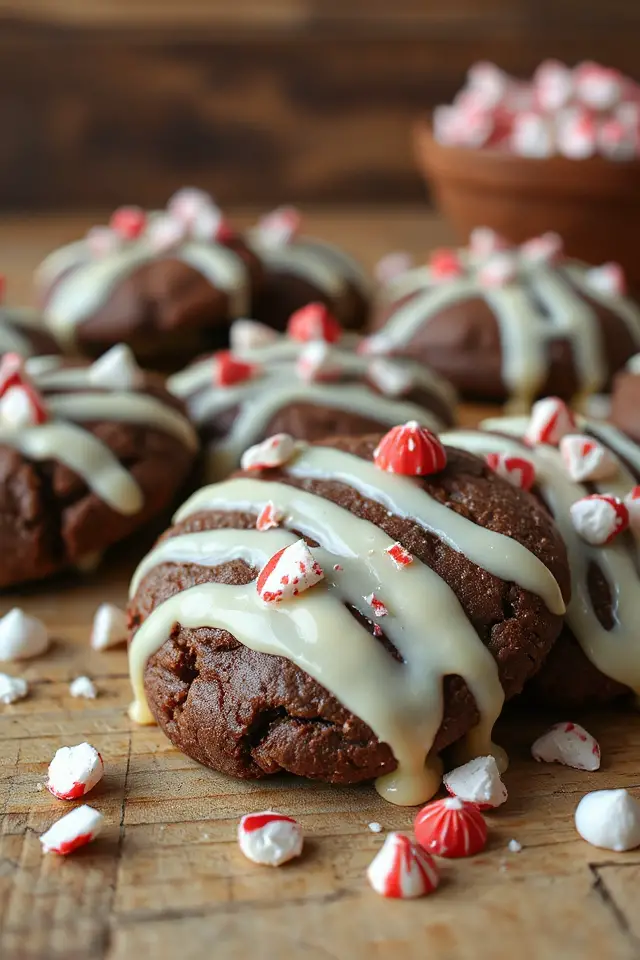
Plus, they’re visually stunning, with that glossy chocolate coating and a sprinkle of crushed candy.
Trust me, once you bake a batch, you’ll find them disappearing faster than you can say “holiday cheer.”
Ingredients of Chocolate Peppermint Cookies
When it comes to baking, having the right ingredients on hand is key to creating something truly delicious. For Chocolate Peppermint Cookies, the combination of rich cocoa and invigorating peppermint is what makes these cookies so special. You might find yourself daydreaming about the smell of chocolate wafting through your kitchen while they bake.
Gather your ingredients, and let’s get started on this delightful recipe.
Here’s what you’ll need to whip up a batch of these festive cookies:
- 1 cup all-purpose flour
- 1/2 cup unsweetened Dutch-processed cocoa powder
- 1/2 teaspoon baking soda
- 1/2 teaspoon baking powder
- 1/2 teaspoon salt
- 5 tablespoons unsalted butter, softened
- 3/4 cup sugar
- 1 large egg
- 1 large egg yolk
- 3/4 teaspoon peppermint extract
- 30 peppermint candies, crushed
- 2 lbs white chocolate, coarsely chopped
Now, let’s talk about some ingredient considerations. If you’re feeling adventurous, you can play around with the type of cocoa powder you use. Dutch-processed cocoa gives a deep chocolate flavor, but if you can’t find it, natural cocoa works just fine.
And about those peppermint candies—crushing them can be a bit of a workout, but it’s also pretty satisfying. Just make sure to separate the larger pieces from the dust. That dust is great for sprinkling, while the larger bits add a nice crunch on top.
How to Make Chocolate Peppermint Cookies
To make these delightful Chocolate Peppermint Cookies, you’ll want to start by gathering your ingredients. You’ll need 1 cup of all-purpose flour, 1/2 cup of unsweetened Dutch-processed cocoa powder, and a few other essentials like 5 tablespoons of softened unsalted butter and 3/4 cup of sugar. Don’t forget about that magical 3/4 teaspoon of peppermint extract—it’s what brings that invigorating zing to the chocolatey goodness.
Now, let’s get to the fun part, the mixing!
First, preheat your oven to 350 degrees, which is perfect for baking. In a bowl, sift together your flour, cocoa powder, baking soda, baking powder, and 1/2 teaspoon of salt. It’s like a mini workout—just think of it as giving those dry ingredients a good fluffing.
Now, grab your mixer and beat the softened butter and sugar together on medium-high speed for about a minute until it’s light and fluffy. Next, you’ll want to lower the speed to medium-low and add in one large egg and one large egg yolk, mixing well after each addition. Once that’s all combined, toss in the peppermint extract and mix again. Slowly add the flour mixture, and stir until just incorporated. It should be a nice dough that’s not too sticky.
Now comes the hard part—waiting! Shape your dough into two disks, wrap them in plastic, and pop them in the fridge for at least an hour. I know, it feels like forever, but trust me, it’s worth it for the perfect cookie texture.
After chilling, roll out one disk on a lightly floured surface to about 1/8 inch thick, then freeze those cut cookies for about 15 minutes to firm them up. Use a 2-inch round cutter to create those cute cookie circles, and don’t forget to save the scraps for re-rolling.
Bake them for about 12 minutes until they’re dry to the touch—your kitchen will smell like a chocolate factory, and you might struggle not to eat them all before they’re decorated.
Once cooled, dip each cookie into melted white chocolate, sprinkle with crushed peppermint candy or dust, and let them set in the fridge. Just remember to save some for later, or you might find yourself standing over the cooling rack, cookie crumbs all over your shirt, wondering where they all went.
Enjoy your baking adventure!
Chocolate Peppermint Cookies Substitutions & Variations
Exploring substitutions and variations can take your Chocolate Peppermint Cookies to new heights.
If you want a gluten-free option, swap all-purpose flour for a gluten-free blend. For a richer flavor, try using dark chocolate instead of white chocolate. If you’re out of peppermint extract, almond extract can provide a delightful twist.
You can also experiment with different mix-ins like chopped nuts or dried cherries. If you prefer a softer cookie, reduce the baking time slightly.
Don’t hesitate to get creative—each variation can lead to a deliciously unique treat! Enjoy customizing your cookies to fit your taste!
What to Serve with Chocolate Peppermint Cookies
After you’ve whipped up a batch of Chocolate Peppermint Cookies, it’s time to think about what to serve alongside them.
I love pairing these cookies with a warm mug of hot cocoa or a rich peppermint mocha. The flavors complement each other perfectly!
If you’re hosting a gathering, consider adding a scoop of peppermint ice cream on the side for a cool contrast.
Fresh fruit, like strawberries or raspberries, can also brighten the dessert table and balance the sweetness.
Finally, a sprinkle of crushed peppermint candies on top of whipped cream makes for a festive touch.
Enjoy the delicious combinations!
Additional Tips & Notes
While baking these Chocolate Peppermint Cookies, I’ve found a few tips that really enhance the experience.
First, make certain your butter is truly softened; it makes a world of difference in mixing. I like to refrigerate the dough overnight for improved flavor and texture.
When rolling out the dough, keep your surface and rolling pin lightly floured to prevent sticking.
For an extra festive touch, try using different colored sprinkles alongside the crushed peppermint.
Finally, don’t rush the cooling process; letting the cookies set properly guarantees they hold their shape and flavor beautifully.
Enjoy your baking adventure!